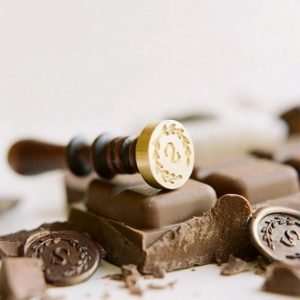


Soap Stamps: Elevate Your Handmade Soaps with Unique Designs
Handmade soaps are more than just skincare essentials—they’re an art form. Whether you’re a hobbyist or a professional soap maker, adding a custom stamp to your soap bars can elevate their appeal, enhance branding, and make them truly unique.
Soap stamps allow you to imprint logos, intricate patterns, or personalized messages onto your creations, making them stand out in the market or as thoughtful gifts. In this guide, we’ll explore the benefits of soap stamps, how to use them effectively, and tips for choosing the perfect design.
Why Use Soap Stamps?
✔ Professional & Branded Look – A custom stamp with your logo or brand name instantly makes your soaps look high-end and recognizable.
✔ Personalization & Creativity – Whether it’s a floral pattern, a meaningful symbol, or a festive design, stamped soaps add an artistic touch.
✔ Perfect for Gifts & Small Businesses – Impress your customers or gift recipients with a unique, handcrafted product that feels luxurious and special.
✔ Easy & Cost-Effective – Soap stamping is a simple yet impactful way to enhance your soaps without expensive tools or complex techniques.
Types of Soap Stamps
Soap stamps come in different materials, each offering unique benefits:
🛁 Acrylic Stamps – Lightweight and affordable, great for beginners.
🛁 Wood & Rubber Stamps – Traditional options that work well for intricate designs.
🛁 Metal Stamps – Ideal for professional-grade, deeply embossed impressions.
🛁 3D-Printed Stamps – Customizable and precise, perfect for small business branding.
How to Use a Soap Stamp Properly
1. Choose the Right Soap Texture
Soap should be firm but not too hard. If it’s too soft, the stamp may distort the design; if it’s too dry, the imprint may not be clear.
💡 Best time to stamp? About 24 hours after cold process soap is poured, or while melt-and-pour soap is still slightly warm but solid.
2. Prepare the Stamp
- Lightly coat the stamp with mica powder, cornstarch, or rubbing alcohol to prevent sticking.
- If using an acrylic or wooden stamp, gently press on a test bar before applying to the final product.
3. Press Firmly & Evenly
- Apply steady, even pressure to ensure a clean, crisp imprint.
- If needed, use a small mallet for deep engraving.
4. Carefully Remove the Stamp
- Slowly lift the stamp straight up to avoid smudging or distortion.
- Allow the soap to fully cure before handling extensively.
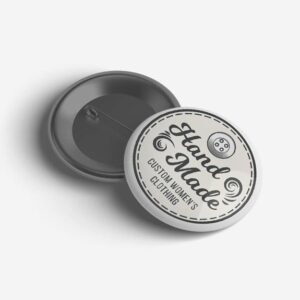
Choosing the Perfect Soap Stamp Design
When selecting a design, consider:
✅ Your Brand Identity – A logo stamp reinforces brand recognition.
✅ Simple vs. Detailed Designs – Fine details can be tricky to imprint on soft soap, so choose bold, clear designs.
✅ Custom or Pre-Made Stamps – Custom-made stamps add a personal touch, while pre-designed stamps offer convenience.
✅ Stamp Size – Ensure the size fits well on your soap bars without overwhelming the design.
Final Thoughts
Soap stamps are an easy, creative, and impactful way to enhance your handmade soaps. Whether you’re a small business owner or a DIY enthusiast, adding a unique imprint to your soaps makes them more memorable and visually appealing.